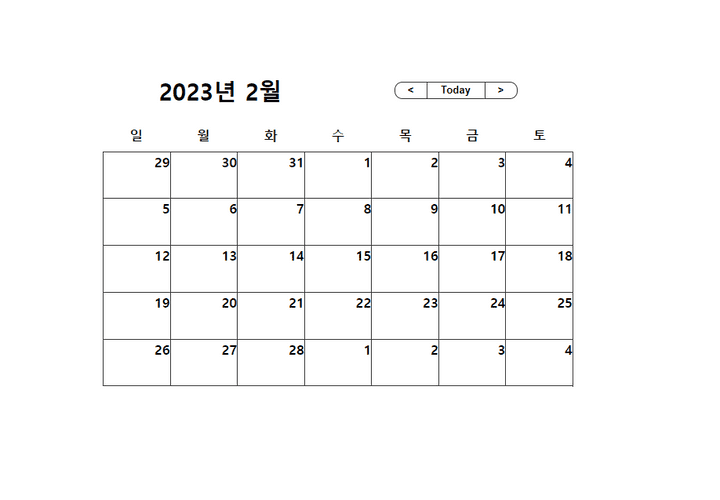
TodoList (7) - Calendar 스타일 입히기
* {
    margin: 0;
    padding: 0;
    box-sizing: border-box;
}

body {
    font-family: "Nunito", sans-serif;
    margin: 0;
    padding: 0;
    height: 100vh;
    width: 100vw;
    border: 1px solid gray;
    display: flex;
    justify-content: center;
    align-items: center;

}
-
*를 선택해 전체적인 태그들의 **margin과 padding을 없애준다 -
달력을 가운데 정렬하기위해서
display: flex -
좌우 가운데 정령을 위해
justify-content: center -
위아래 가운데 정렬을 위해서
align-items: center
.calendar {
  width: 600px;
  margin: 50px;
}
캘린더의 크기를 설정 해 줍니다
.header {
    display: flex;
    justify-content: space-around;
    align-items: center;
}

.year-month {
    font-size: 30px;
    font-weight: bold;
}

.nav {
    display: flex;
    border: 1px solid #333333;
    border-radius: 10px;
}-
header안에 있는 날짜와 버튼을 좌우 양쪽 정렬과 상하 가운데 정렬을 해주기 위해서
justify-content: space-around와align-items: center를 사용 -
그리고 버튼을 한줄로 정렬하기 위해서
flex사용
.nav-btn {
    width: 40px;
    height: 20px;
    border: none;
    background-color: transparent;
    cursor: pointer;
    font-weight: bold;
}

.go-today {
    width: 75px;
    border-left: 1px solid #333333;
    border-right: 1px solid #333333;
}
border: none사용해 버튼의 선을 제거background-color: transparent사용해 배경색을 지정하지 않음
.days {
    display: flex;
    margin: 25px 0px 10px;
}

.day {
    font-weight: bold;
    font-size: 17px;
    width: calc(100% / 7);
    text-align: center;
}-
days 클래스에 있는 요일들을 한줄로 정렬하기 위해
flex사용 -
margin : 위 좌우 아래; 속성을 이용해서 margin 값을 줌
-
요일은 7개이므로 각 요일의 너비를 같게 하기위해서 100%/7의 값을 너비값으로 줌
.dates {
    display: flex;
    flex-flow: row wrap;
    height: 500px;
    border-top: 1px solid #333333;
    border-right: 1px solid #333333;
}

.date {
    font-weight: bold;
    font-size: 17px;
    width: calc(100% / 7);
    text-align: right;
    border-bottom: 1px solid #333333;
    border-left: 1px solid #333333;
}
-
각 날짜들의 정렬을 위해서
display: flex를 사용 -
아이템들의 자연스러운 줄바꿈을 위해서
flex-flow: row wrap을 사용 -
height를 고정할시 아이템의 갯수에 상관없이
주어진 픽셀에 맞춰 자연스운 줄 바꿈을 할 수 있다. -
날짜도 한줄에 7개가 있어야 하므로 100%/7의 값을 너비값으로 줌

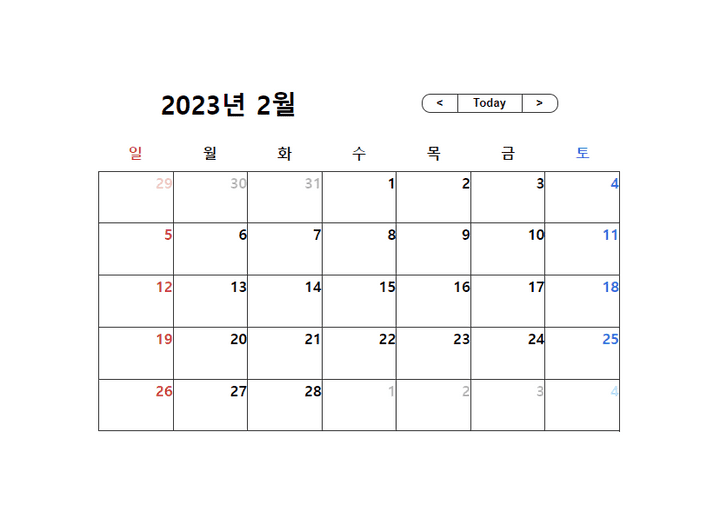
토요일과 일요일 color 지정하기
.day:nth-child(7n + 1),
.date:nth-child(7n + 1) {
    color: #D13E3E;
}- 일요일에 해당하는 날짜는 7n+1의 간격으로 days의 자식으로 배치 되어 있는걸
알 수 있다..day:nth-child(7n + 1),.date:nth-child(7n + 1)를 사용해
빨간색으로 지정해 주었다
.day:nth-child(7n),
.date:nth-child(7n) {
    color: #396EE2;
}- 토요일에 해당하는 날짜는 7n의 간격으로 days의 자식으로 배치 되어 있는걸
알 수 있다..day:nth-child(7n + 1),.date:nth-child(7n + 1)를 사용해
파란색으로 지정해 주었다
.other {
    opacity: 0.3;
}
우리가 renderCalendar 함수를 만들때 마지막 부분에 삼항연산자를 이용해 condition의 조건이 참일때 this 거짓일때 other를 했던 부분이 생각날 것이다.
- 이번달에 해당되지 않는 날짜는 흐릿하게 보여주기 위해서
opacity를 통해 투명도를 결정해줌

우리가 처음에 봤던 달력과 똑같은 결과물이 나오는걸 볼 수 있다
이제 버튼의 기능을 만들어 좀 더 동적인 달력을 만들어 보도록 하자 ->